
How to Add a Popup to Your Shopify Store in 15 Minutes or Less
Adding a popup to your Shopify store doesn't have to be difficult. We'll show you how to design, target, and launch a popup in 15 minutes or less.

Written by Devin Pickell
Popups are still one of the best ways to consistently grow your email subscribers for your Shopify store. An experienced ecommerce marketer can get their popup campaigns live within minutes and turn store browsers into email subscribers eagerly awaiting promotional offers, limited-time sales, new product releases, and more.
If you’ve never added a popup to your Shopify store or are still learning the ways of popup campaigns, no worries, we got you covered. We’ll teach you step-by-step how to add a popup to your Shopify store in 15 minutes or less.
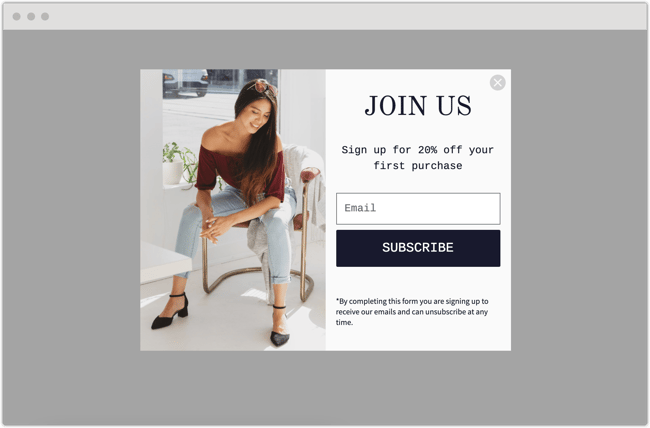
By the end of this article, you’ll be able to add a basic popup like the one below or create more complex popups like these Privy customer examples. Let’s get started!
How to add a popup to your Shopify store
1. Install a popup app to your Shopify store
2. Create a coupon offer for your popup
3. Design your popup and add your coupon
4. Set your target audience and triggers
5. Launch your popup campaign
Step 1: Install a popup app to your Shopify store
First, you'll need an app to create and launch popups on your Shopify store. While there are hundreds of apps to choose from, we recommend going with Privy, the #1-reviewed sales app in the Shopify App Store used by over 700,000 online merchants.
Installing Privy takes only a few steps and you can even try it free for 15 days with an unlimited amount of popups and access to all popup types. Once installed, it’s time to set up your coupon offers to encourage email signups.
Step 2: Create a coupon offer for your popup
While you technically don’t need coupons to launch popups, they make signing up for your email marketing list that much more enticing. Coupons are great for providing value in exchange for an email address and nudging a subscriber toward their first purchase. Trust us, that 20% off code goes a long way.

To create coupons in Privy, follow these steps:
1. Select 'Coupons' from the main navigation
2. Tap the 'New Coupon' button
3. Give your coupon a name, e.g. '20% off Welcome Discount.'
4. Select your coupon source. For Shopify stores, Privy automatically syncs your coupons with your Shopify store.
5. Select whether you'd like this to be a Master Coupon on Unique Coupon. Fore sitewide sales and campaigns, you'll typically fo with a master coupon.
6. Click 'Save' to finalize your settings.
Customers will spend about 24% more on their orders when they’re offered coupons. Adding a coupon to your welcome popup when a first-time visitor lands on your website gives you the best chance at converting them into an email subscriber and ultimately a customer.
Step 3: Design your popup and add your coupon
Now that you have an offer ready for your subscribers, it’s time to create a popup that will welcome shoppers soon after they land on your site. Start by tapping ‘Plays’ from the main Privy navigation, select ‘Welcome Discount popup,’ and choose the coupon you just created from the previous step. The 15-second video below also shows you how to get here:
You’re now in Privy’s drag-and-drop editor where you can fully customize your welcome popup. Feel free to change the layout, images, logos, font, colors, anything you feel will impact email signups for your Shopify store. Just be sure to follow these best practices when designing your popup so it also performs well on mobile devices.
When you’ve designed something that fits the look and feel of your brand, it’s time to customize a ‘Thank You’ page that displays after someone enters their email address. This page reminds someone to check their email for their welcome code or can be used to reveal the code immediately, it’s up to you.
If you’ve gone the route of email, make sure you automate an after signup email to send immediately after someone submits their information. This email will contain the coupon code you created earlier. Below is an example of what this email may look like using a basic Privy email template.
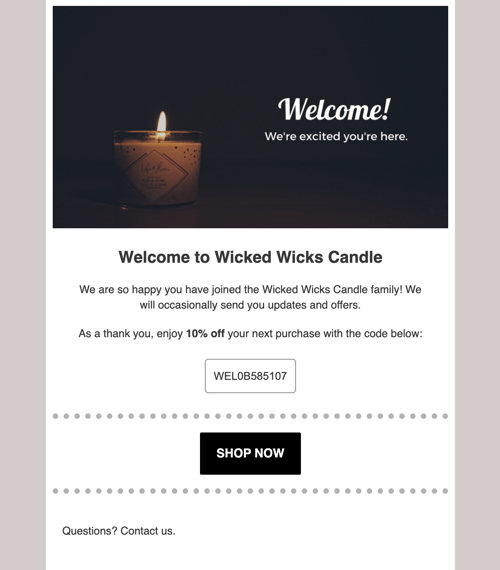
For first-time Privy users, this help article will tell you all you need to know about creating an after signup email template in just a few minutes.
Your popup is nearly complete and ready to launch on your Shopify store! Just a few more steps to go.
Step 4: Set your target audience and triggers
With your popup design out of the way, it’s time to decide where you want to display it on your Shopify store and who you want to see it. These are called target audience and trigger settings.
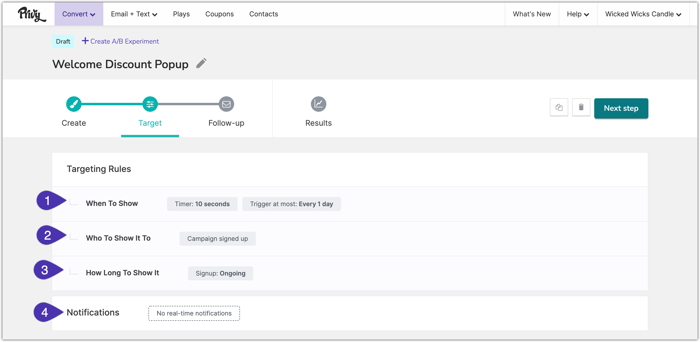
Any Privy popup campaign you select will have a recommended target audience and triggers already set for you, but these can be adjusted however you want. In this case, a welcome discount appears (by default) after 10 seconds to new visitors who haven't previously submitted their email address or phone number on a Privy campaign.
There are tons of ways to adjust your Privy popup settings. For example, you can show specific popups only to shoppers using mobile devices. You can filter by audiences who have a certain dollar amount in their shopping carts. You can even trigger popups to show to website visitors in certain countries.
Your target audience and triggers really depend on the goal of your campaign. Popups that grow email sign-ups have a different purpose than popups that are meant to recover abandoned carts.
Step 5: Launch your popup campaign
In just 4 steps, you’ve been able to add a popup to your Shopify store that will capture email sign-ups and reveal a coupon code to first-time shoppers. But your work isn’t done quite yet.
In the coming weeks and months, you’ll want to analyze the performance of your popups. Maybe it’s not capturing as many signups as you anticipated, this is where you’ll go back into your campaign and make the necessary adjustments. Thankfully, you can see the performance of each campaign within Privy so there’s no second-guessing.
Next up: Add a cart saver campaign to your Shopify store
You’ll be growing your email marketing list in no time using Privy, but what about when shoppers leave their carts without purchasing?
We’ve written the guide on 3 abandoned cart recovery strategies that are proven to help you chip away at cart abandonment slowly and surely. Being able to recover even 5% more of shopping carts can mean a huge boost in sales for your Shopify store.

Writen by Devin Pickell
You may also like to read
Learn how we responsibly build, test, and refine AI models and capabilities to ensure accuracy and domain relevancy.
Privy 3.0: More Than Popups. How Privy Helps Independent Shopify Stores Win.
Think you know Privy? Think again. Privy 3.0 is here. And it’s WAY more than popups. Intuitive, powerful email and SMS marketing. Here's what we're up to.
Create authentic urgency and exclusivity with locked website launches
A locked website launch is a highly effective way to create exclusivity and drive urgency with your email & SMS subscribers. Get tips on how you can try this play in 3 simple steps.
The Two-Way Email Marketing Strategy
Building authentic relationships through your email marketing is the best way to ensure your subscriber base remains engaged over time. Learn how to build a conversational email strategy today.