
How to Add a Form Builder To Your Shopify Store In Just 4 Steps
Looking to grow email signups for your brand newsletter? We'll show you step-by-step how to do this using a form builder for your Shopify store.

Written by Devin Pickell
Adding a form to your Shopify store is a great way to capture email addresses and other contact information that turns casual store browsers into engaged email subscribers. From here, you’ll be able to send these contacts your marketing newsletters – notifying them of promotional offers, limited-time sales, new product releases, and more.

Growing your email list with a form builder is simple with the right Shopify app. In this article, we’ll teach you how to build and launch a form using Privy so you can start capturing email addresses and growing your online sales.
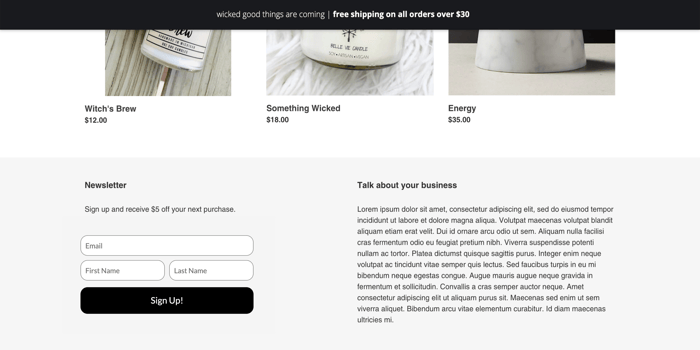
By the end of this article, you’ll be able to add a basic form like the one below or create more complex forms like these Privy customer examples. Let’s get started!
How to add a form builder to your Shopify store
1. Install a form builder app to your Shopify store
2. Create a display for your form
3. Automate a follow-up email
4. Launch and embed your form
Get our best content on ecommerce marketing in your inbox 2 times a week
Step 1: Install a form builder app to your Shopify store
You’ll first need an app to create and launch forms on your Shopify store. While there are hundreds of apps to choose from, we recommend going with Privy, the #1-reviewed sales app in the Shopify App Store used by over 700,000 online merchants.
Installing Privy takes only a few steps and you can even try it free for 15 days with an unlimited amount of forms and access to all types of form designs. Once installed, it’s time to set up your form – starting with its design and capture fields.
Step 2: Create a display for your form
While contact forms are straightforward, they still need a design that fits the look and feel of your Shopify brand. But before getting into design, let’s start with creating a basic display that will contain all the contact information your form will capture.
To create a form display in Privy, follow these steps:
1. Select ‘Convert’ then ‘All Displays’ from the main navigation.
2. Tap the ‘New display’ button then ‘Build your own’.
3. Name your form then tap ‘Create Display’.
4. Select which form fields you’d like to display. The most common field is email address but you can also add first name, last name, birthday, and more.
5. Finally, choose the validations for your form. For example, you’ll only want this form to work for new contacts when they sign up for your newsletter.
With the technical details out of the way, it’s time to customize your form using Privy’s design editor. Let’s start with one of our pre-built templates.
To customize your form template in Privy, follow these steps:
1. Select the ‘Add a display’ option.
2. Choose from a variety of Privy’s pre-built ‘Embedded Form’ templates, then tap ‘Save’.
3. Customize the form’s design, content, font, and whatever else you feel will look the best on your website.
You’re almost done with your form! You just need to make sure a ‘Thank You’ message is shown to anyone who signs up for your newsletter. To sweeten the deal and encourage even more signups, we included instructions for adding a coupon offer to your embedded form. Trust us, even a 10% first-time offer can do wonders for your email list growth.
To show your ‘Thank You’ message and add a coupon code, follow these steps:
1. Select the ‘After signup Action’ option in the design tab.
2. Customize the ‘Thank You’ message to match the design of your form.
3. To add a coupon code, double check that the merge tag is included so that the appropriate code is shown. Click ‘Save’.
So that’s it! Your form, thank you page, and coupon offer is pretty much complete. If you’re not 100% sure about the design, you can always go back and edit its appearance. If you’re happy with the design, it’s time to move on to automating an email to send immediately after signup.
Step 3: Automate a follow-up email
About 74% of consumers today expect welcome emails if they’re signed up for a brand’s newsletter. This is why it’s important to automate an email to send whenever someone signs up. It helps you stay top of mind with subscribers and encourages that important first purchase.
In Privy, after-sign up emails are enabled by default. They’ll trigger to send immediately after each signup you get through your form.
This is also the time to think about your welcome email copy and design if you haven’t already. Thankfully, you can choose from dozens of pre-made email templates in Privy and customize them using the drag and drop editor. Privy beginners can read more about in-depth tips for creating after signup emails.
It’s recommended that you create a welcome email series – three timed emails that automatically send to new subscribers.
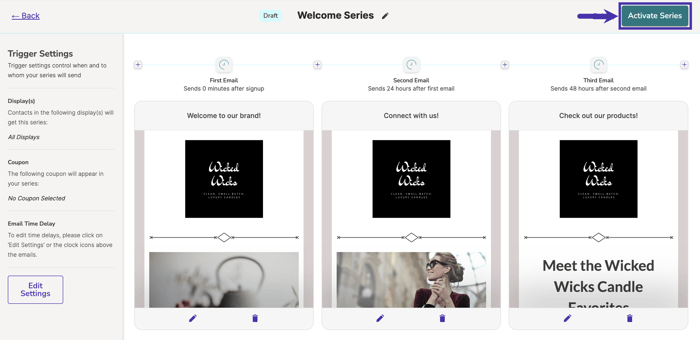
There are tons of directions you can take your welcome series, but the one below can be common for brands:
1. Brand Introduction (immediately after signup): The first email after signing up. Use this email to share who you are, what you do, and how you can help them.
2. Get Social (24 hours after first email): Use this email to highlight your social media and customer reviews, testimonials help here! This can grow your follower count or subscriptions on other channels.
3. Product Spotlight (48 hours after second email): Use this email to highlight some of your best sellers, seasonal products, flash sale items, and more.
Whether you decide to send one after signup email or a series of three emails, following up with your subscribers and keeping them engaged is the goal.
Step 4: Launch and embed your form
Once your form looks good and is ready to capture contacts, click the ‘Publish’ button to launch it. After launching, you’ll need to embed this form in your Shopify store. So grab the embed code located in the Create tab:
Copy and paste the embed code into your Shopify store’s HTML editor where you’d like your form to appear. One of the most common areas to place form builders is in the footer of a website. This 2-minute help center article shows you step-by-step how to do this using Privy and your current Shopify store theme.
Next up: Adding a popup to your Shopify Store
Congrats! Your form is embedded and live in your Shopify store. You’re now ready to start capturing emails from subscribers who want to hear more from your brand. But form builders aren’t the only way to get more contacts.
One of the best ways to grow your email or SMS lists is through well-designed, well-timed popups. Adding a popup to your Shopify store is made simple with Privy, and you can get your first campaign live in 15 minutes or less. Try it free and choose from dozens of ready-to-use popup templates to add to your store.

Writen by Devin Pickell
You may also like to read
Learn how we responsibly build, test, and refine AI models and capabilities to ensure accuracy and domain relevancy.
Privy 3.0: More Than Popups. How Privy Helps Independent Shopify Stores Win.
Think you know Privy? Think again. Privy 3.0 is here. And it’s WAY more than popups. Intuitive, powerful email and SMS marketing. Here's what we're up to.
Create authentic urgency and exclusivity with locked website launches
A locked website launch is a highly effective way to create exclusivity and drive urgency with your email & SMS subscribers. Get tips on how you can try this play in 3 simple steps.
The Two-Way Email Marketing Strategy
Building authentic relationships through your email marketing is the best way to ensure your subscriber base remains engaged over time. Learn how to build a conversational email strategy today.